Support and Documentation
In case you need to upload a large amount of POIs to your account, it’s a way quicker to import all of them from an Excel file rather than create manually one by one. To import the data, it’s enough to prepare and upload a spreadsheet file in any of these formats: XLS, XLSX or CSV.
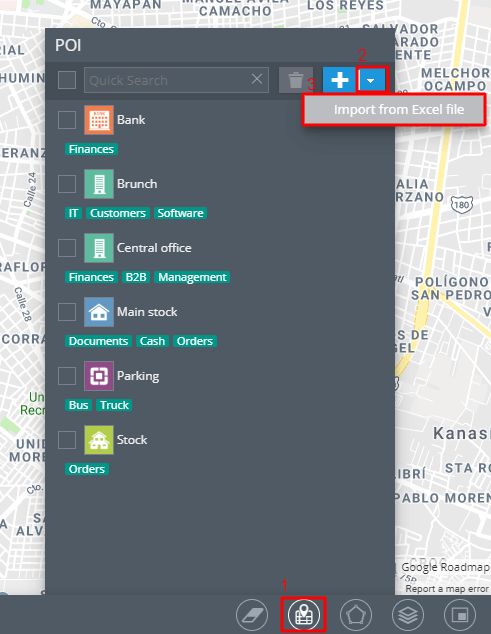
In order to start importing from the file: Head over to the bottom right-hand tool panel, click on the “POI” tool, press the down arrow and tap on “Import from Excel file”.
In the new window that pops up, you can download a sample Excel file and allow the usage of headers from the selected file by putting a tick.
When preparing a file, it’s highly recommended that you add a single row at the top of your spreadsheet that will act as the headers (or label) for each column. Adding them will ensure correct synchronization. If you don’t have headers, that’s fine — you’ll have the option to create your own headers during the import process.
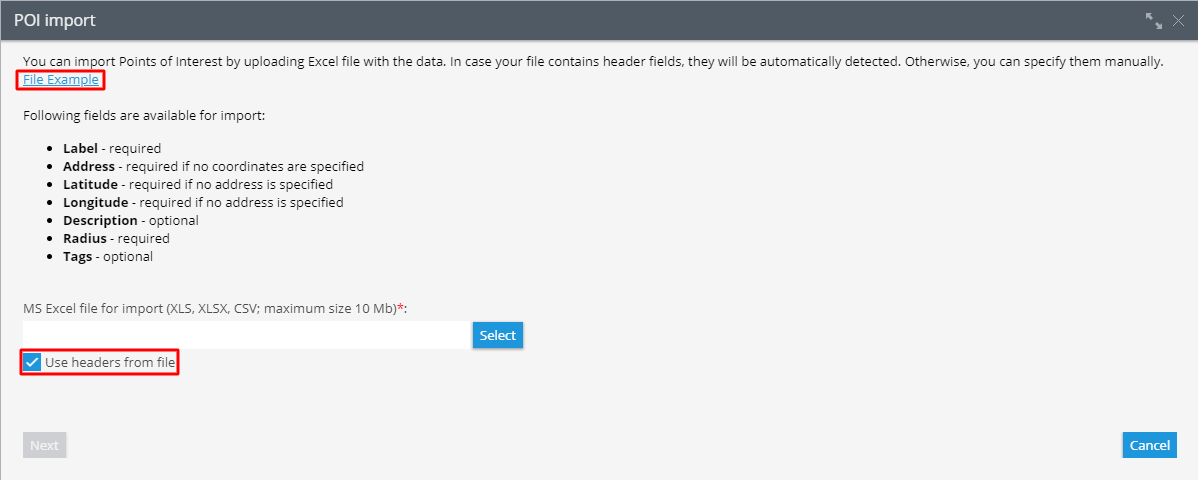
Make sure your file contains the information on:
- Name/Label
- Address
- Latitude
- Longitude
- Radius
After you’ve filled in all the columns, save the file on your PC.
How do I upload the file?
Once the Excel file is ready, you can start importing. To do it, head back to the POI Import starting window, click on the “Select” button, then find the file on your PC and upload it to the platform. Proceed by clicking the “Next” button – a new window with the headers will appear. After checking that everything is correct, you can complete the import.
If some data is missing – the system will offer you to specify it. If there are any blank fields left – the POIs are not going to be imported.
Once the import has been completed successfully, the new POIs will appear in the list.


